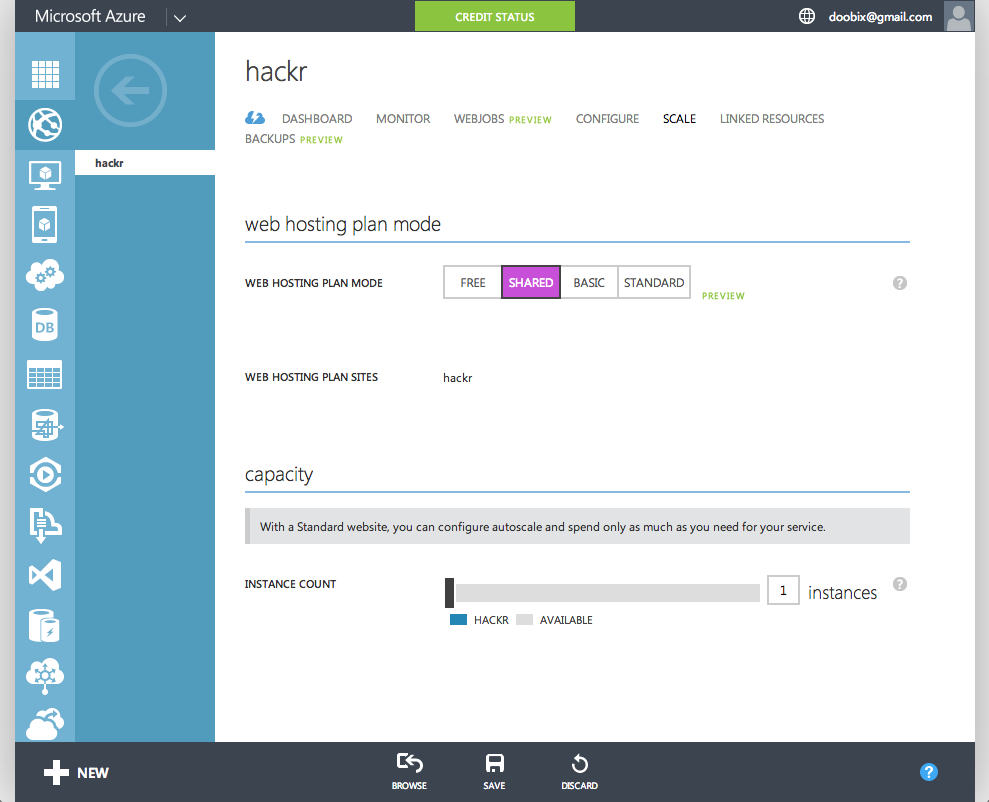
To add a custom domain name to a website hosted on Microsoft Azure (like this website), you must first go into the Azure’s SCALE configuration page and make sure the web hosting plan mode is anything above Free mode. For me, I picked Shared mode.
You’ll then see a “Manage Domains” button at the bottom of Azure. Click that and you will see “THE IP ADDRESS TO USE WHEN YOU CONFIGURE A RECORDS”. Keep note of the IP address.
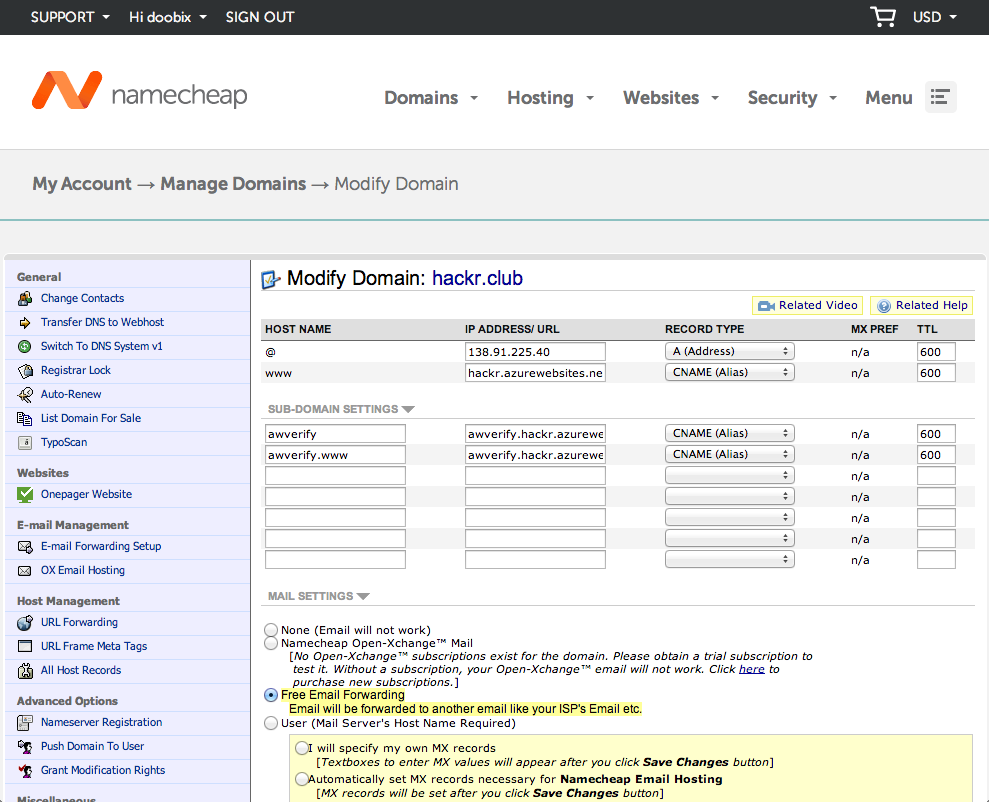
First, we have to go into Namecheap. Click on the domain you want to use, and click “All Host Records” on the left side under Host Management.
We need to create one “A (Address)” and three “CNAME (Alias)” entries. Create the entries as shown below:
HOST NAME     IP Address/URL                         Record Type
@             <the IP address from Azure>            A
www           <website>.azurewebsites.net.           CNAME
awverify      awverify.<website>.azurewebsites.net.  CNAME
awverify.www  awverify.<website>.azurewebsites.net.  CNAME
Save the settings and you should be done with Namecheap.
Now lastly, go back into Azure’s “Manage Custom Domains” and type in the domain name that you’ve just configured. The input box should show a green checkmark indicating that Azure was able to communicate with your domain name on Namecheap.
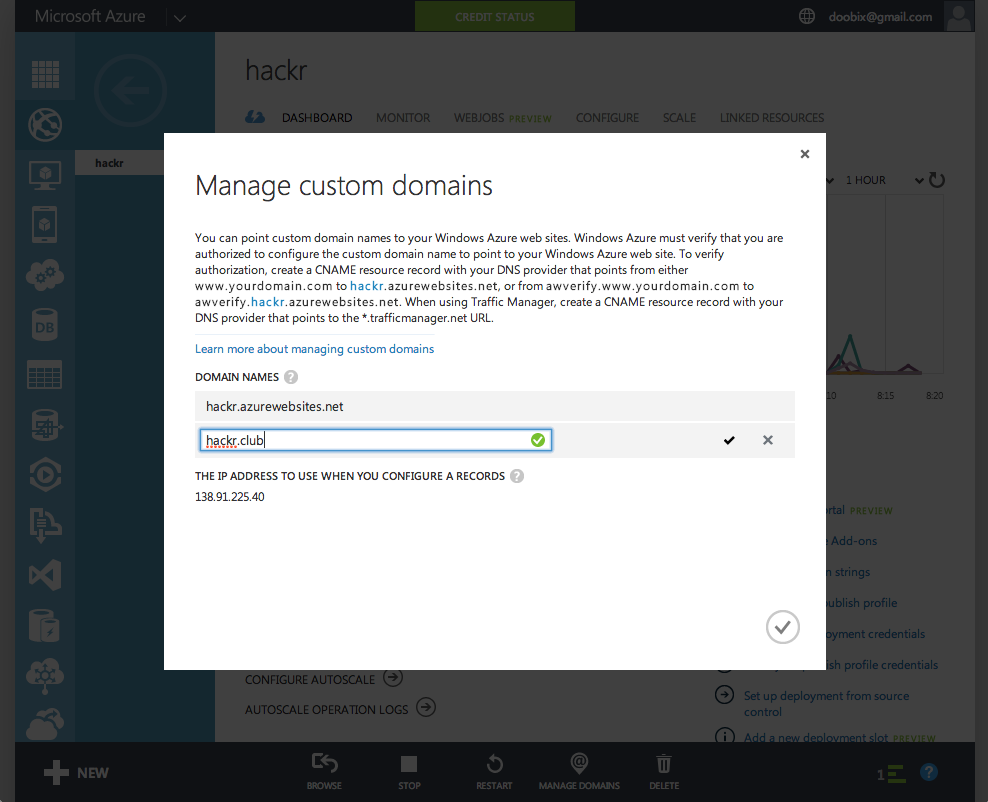
Click the checkmark and you can now access your Azure website with your custom domain!